Ultrasonic thickness testing is a critical process in many industries, used to measure the thickness of materials without causing damage. This non-destructive testing method is essential for assessing the integrity of structures and components, ensuring safety, and maintaining compliance with industry standards. In this guide, we’ll walk you through the step-by-step process of conducting ultrasonic thickness testing like a professional.
Understanding Ultrasonic Thickness Testing
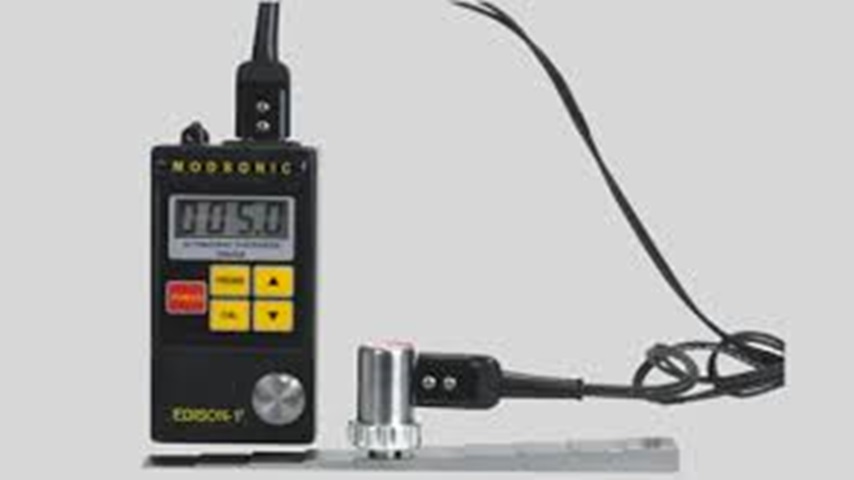
Ultrasonic thickness testing involves the use of an ultrasonic thickness tester, which sends high-frequency sound waves into a material and measures the time it takes for the waves to travel through the material and reflect back. This time measurement is then used to calculate the material’s thickness.
Step 1: Prepare Your Equipment
Before starting the testing process, ensure you have all the necessary equipment and that it is in good working condition.
-
Ultrasonic Thickness Tester: Ensure your device is calibrated and functioning properly.
-
Probes: Select the appropriate probe for the material and thickness range.
-
Couplant: Have the recommended couplant on hand to facilitate the transmission of ultrasonic waves.
-
Calibration Blocks: Use these blocks to calibrate the tester.
Step 2: Calibrate the Ultrasonic Thickness Tester
Calibration is crucial for obtaining accurate measurements.
-
Select Calibration Blocks: Use blocks that match the material and thickness range of the test specimen.
-
Apply Couplant: Place a small amount of couplant on the calibration block.
-
Calibrate: Follow the manufacturer’s instructions to calibrate the tester. This typically involves setting the velocity of sound for the specific material and adjusting the device to the known thickness of the calibration block.
Step 3: Prepare the Test Surface
Proper surface preparation is vital for accurate measurements.
-
Clean the Surface: Remove any dirt, rust, or coatings that might interfere with the ultrasonic waves. A clean surface ensures better contact and transmission.
-
Smooth the Surface: For rough surfaces, use abrasive tools to smooth out the area where measurements will be taken.
Step 4: Apply the Couplant
The couplant is essential for facilitating the transmission of ultrasonic waves between the probe and the test material.
-
Apply Generously: Place a small amount of couplant on the test surface. Ensure it covers the entire area where the probe will make contact.
-
Avoid Air Bubbles: Spread the couplant evenly to avoid air bubbles, which can affect the accuracy of the measurements.
Step 5: Position the Probe Correctly
Correct probe placement is critical for obtaining accurate readings.
-
Perpendicular Position: Place the probe perpendicular to the test surface to ensure the ultrasonic waves travel straight through the material.
-
Consistent Pressure: Apply consistent pressure to the probe to maintain good contact with the material.
Step 6: Take Measurements
Now you are ready to take measurements with your ultrasonic thickness tester.
-
Stable Readings: Wait for stable readings on the display before recording the measurement.
-
Multiple Readings: Take multiple readings at different points on the material to ensure accuracy and identify any variations in thickness.
Step 7: Record and Analyze Data
Proper documentation and analysis of your measurements are essential for making informed decisions.
-
Data Logging: Use the data logging feature of your ultrasonic thickness tester to record measurements. This helps in tracking changes over time and facilitates reporting.
-
Analyze Trends: Analyze the recorded data to identify trends, such as areas of thinning or corrosion. This analysis is crucial for maintenance planning and ensuring the safety and integrity of the structure or component.
Step 8: Regular Maintenance and Calibration
Maintaining your ultrasonic thickness tester is essential for ensuring its longevity and accuracy.
-
Routine Checks: Perform regular checks and maintenance according to the manufacturer’s guidelines.
-
Calibration: Regularly calibrate the device to ensure it continues to provide accurate measurements. Follow the recommended calibration schedule and procedures.
Best Practices for Professional Ultrasonic Thickness Testing
-
Training and Certification: Ensure that all personnel using the ultrasonic thickness tester are properly trained and certified. Understanding the device’s features and limitations is crucial for accurate testing.
-
Use Appropriate Probes: Different probes are designed for specific materials and applications. Always use the correct probe for the material you are testing to ensure accurate readings.
-
Environmental Considerations: Be mindful of environmental factors such as temperature and humidity, which can affect measurement accuracy. Use environmental compensation features if available on your device.
-
Documentation: Keep detailed records of all measurements, calibrations, and maintenance activities. Proper documentation is essential for compliance with industry standards and regulatory requirements.
Conclusion
Conducting ultrasonic thickness testing like a pro involves meticulous preparation, proper calibration, and accurate measurement techniques. By following this step-by-step guide and adhering to best practices, you can ensure reliable and precise thickness measurements, enhancing the safety and integrity of your structures and components. Investing in quality training, maintaining your equipment, and understanding the intricacies of ultrasonic thickness testing will elevate your proficiency and ensure compliance with industry standards.
For industries that prioritize safety, reliability, and compliance, mastering the use of an “ultrasonic thickness tester” is essential. By implementing these practices, you can optimize your testing processes, make informed maintenance decisions, and uphold the highest standards of quality and safety in your operations.